Beyond South Hills Junction
Many of you have seen The Junction at the East Penn Meet, other shows, or at least on my web page. But if you haven’t been to my home you probably don’t know what else is lurking. So let’s take a tour the layout room.
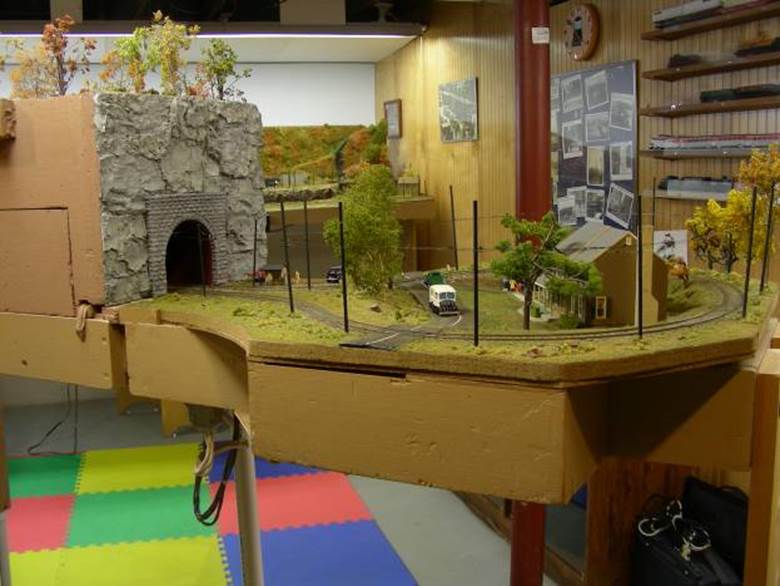
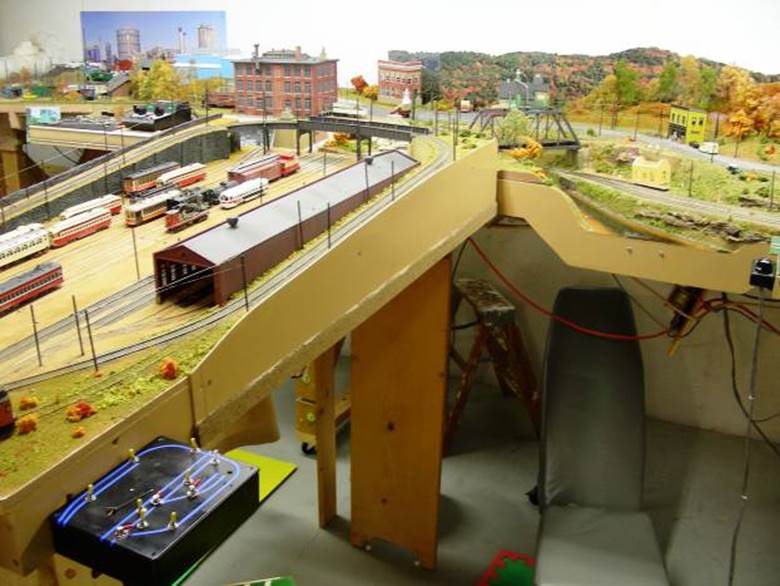
This is the first thing you see when you enter the room:
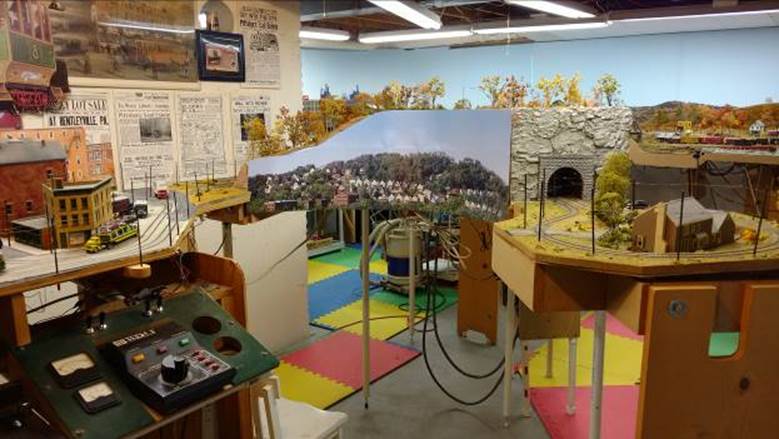
The tunnel portal and the backdrop scene covering piles of foam board are the back of the Junction module. To the left is my first attempt at a trolley layout. I still have it mostly because I never got around to stripping and tossing it. It is now attached to one leg of SHJ – all the high tech measurement tools I used are gone.
I never finished this little module but I got a good education building it – mostly learning from mistakes. This little thing was built to fit between my furnace and water heater in the town house. It weighs a ton, so part of the modifications to hooking it to SHJ is to add wheels on one end so it can be maneuvered relatively easily. Someday I may even get under there and rewire this module.
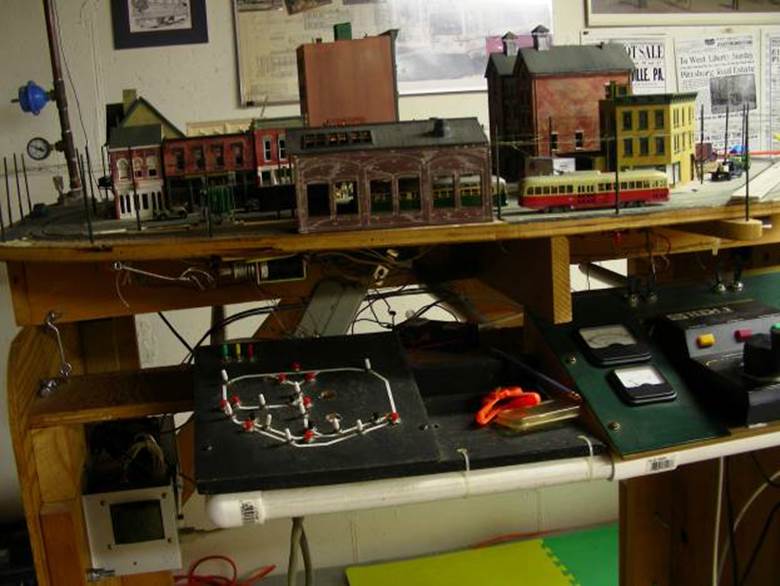
I am happy with this module as far as it goes. This street is well done as is the back of the large building in behind it. Before it was finished I got involved in building one module, then another, then another, I took the time to finish off whatever I was building – something I’m trying to get back to – finishing things.
I even lit up the place. The building on the right is a rough model of the townhouse where this module first lived. The iron City beer truck is one of my favorites.
Across from this first layout is my first East Penn module. It is just a simple loop with a slight grade. Considering the mistakes I made with this I’m sure glad I started small.
This module must be reliable since everything that goes through the Junction must go through the tunnel and around this loop.
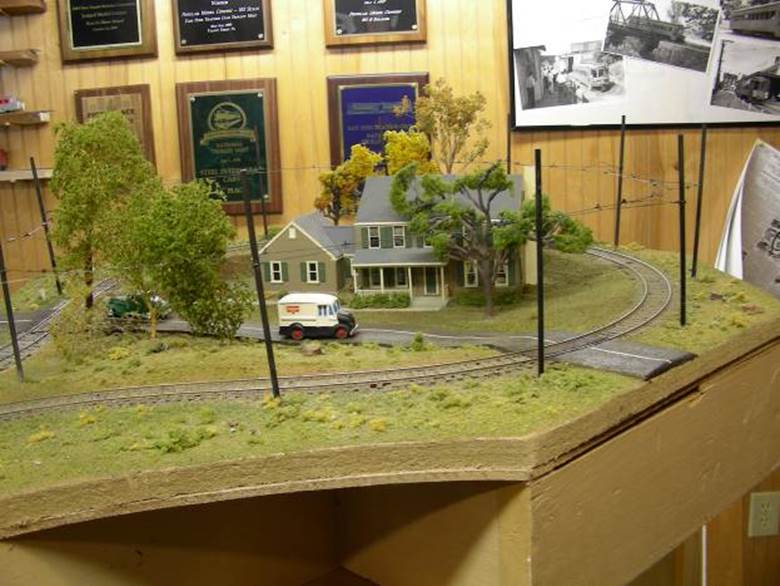
Scenery on this little loop consists of the house where we now live. If you look real hard, and imagine harder, you can get a glimpse the layout room in the basement.
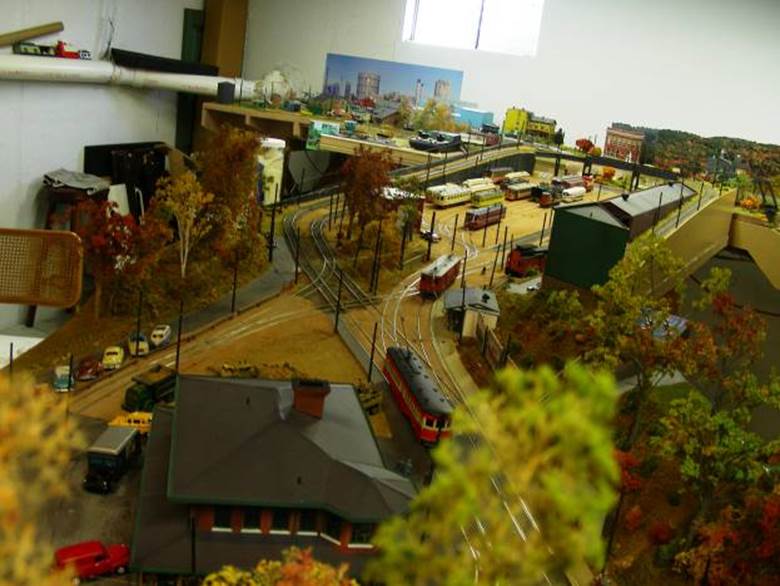
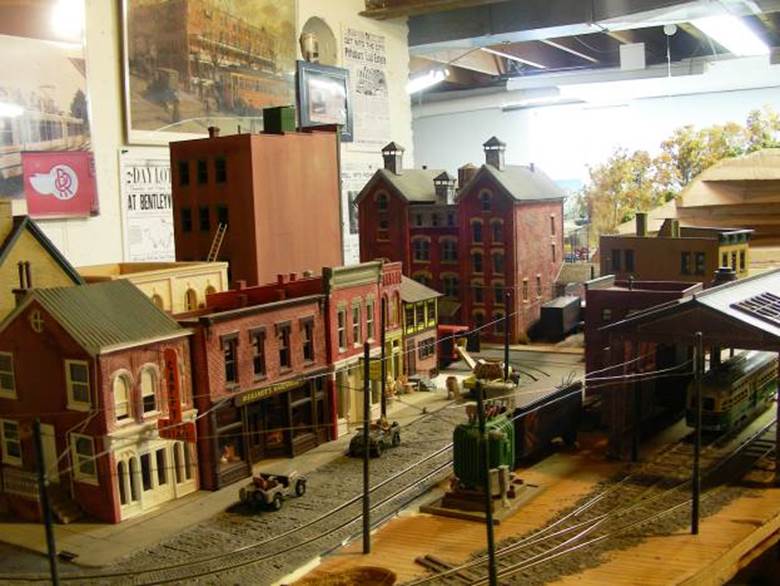
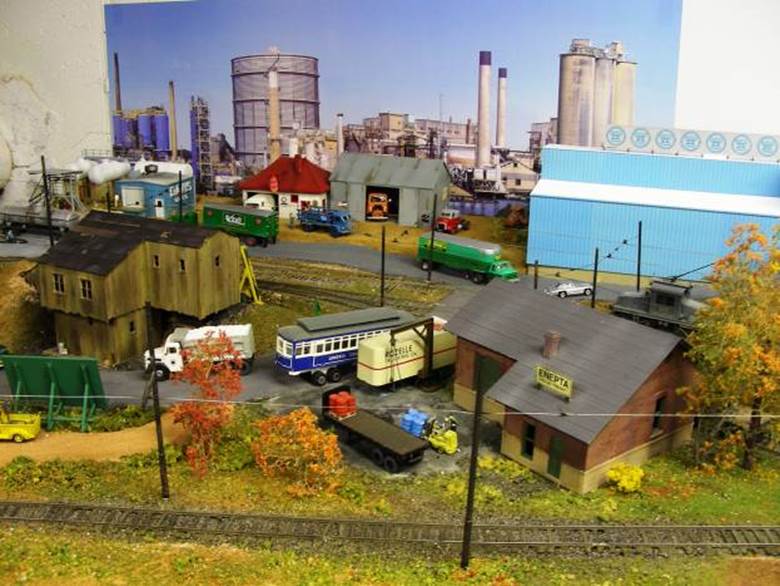
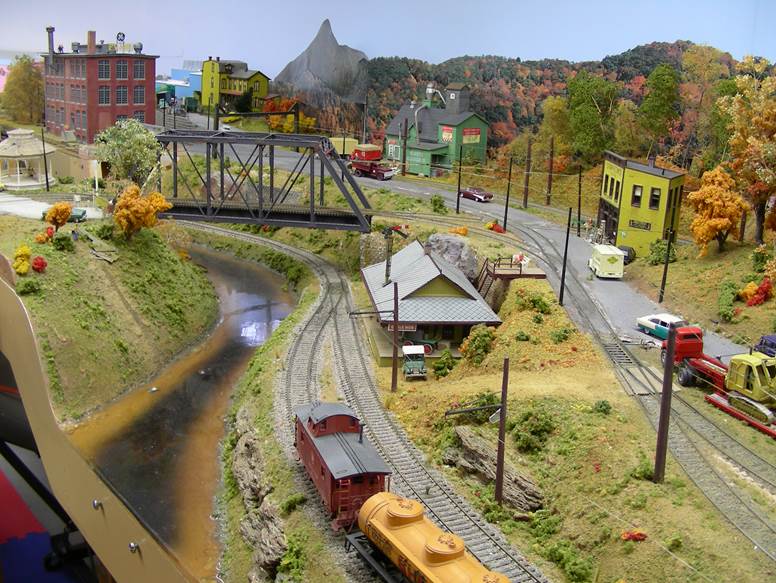
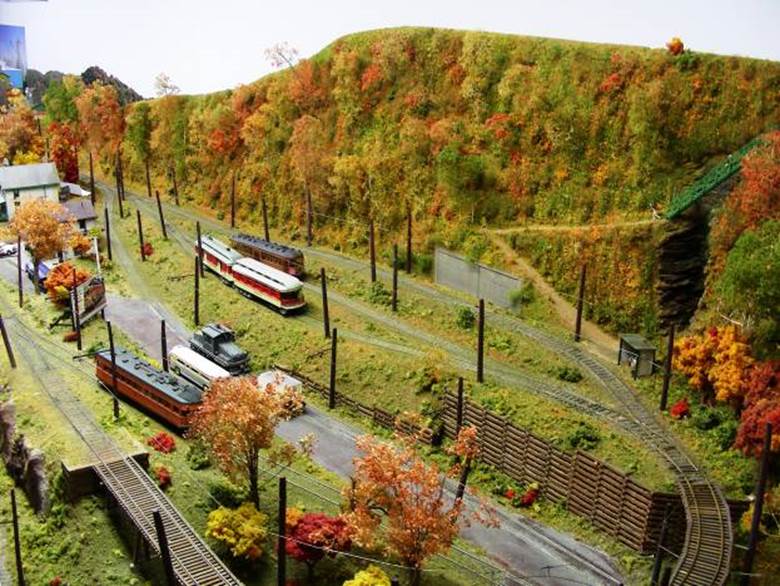
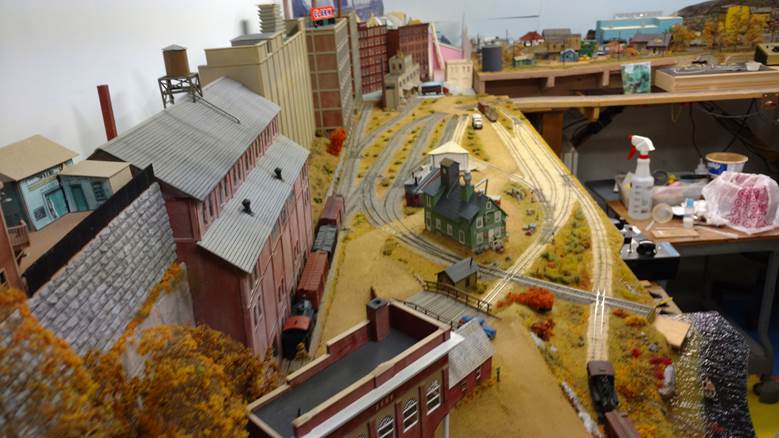
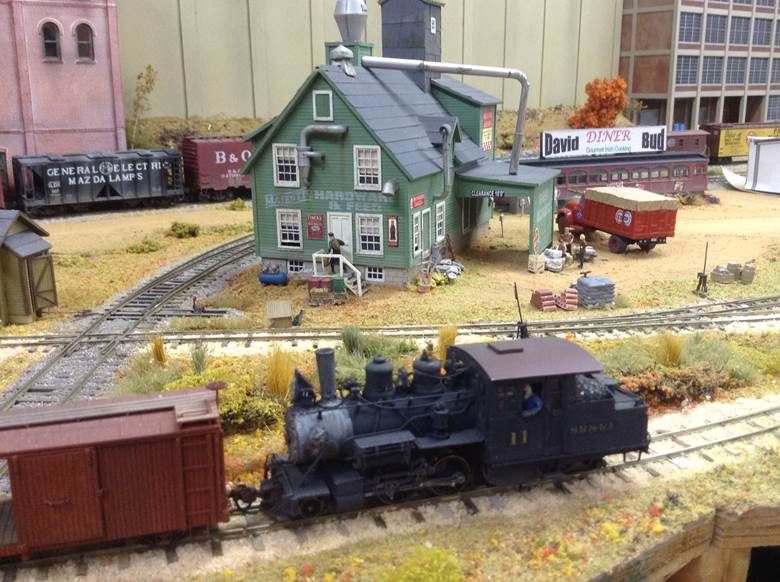
The Junction in the foreground is well documented on my web site, it is out toward the yard that is new.
This yard and loop was my last modular effort – I call it an extension to the Junction module. I wanted something to allow me to operate my travelling modules independently, a loop. Well my 18” loop became a 5’ module of a storage yard, an East Penn Module connection and, oh yes, a loop that had to rise over the yard. I was not trying to model any particular spot; I just wanted to give it some PRCo character with the car barn and bridge, and the retaining wall.
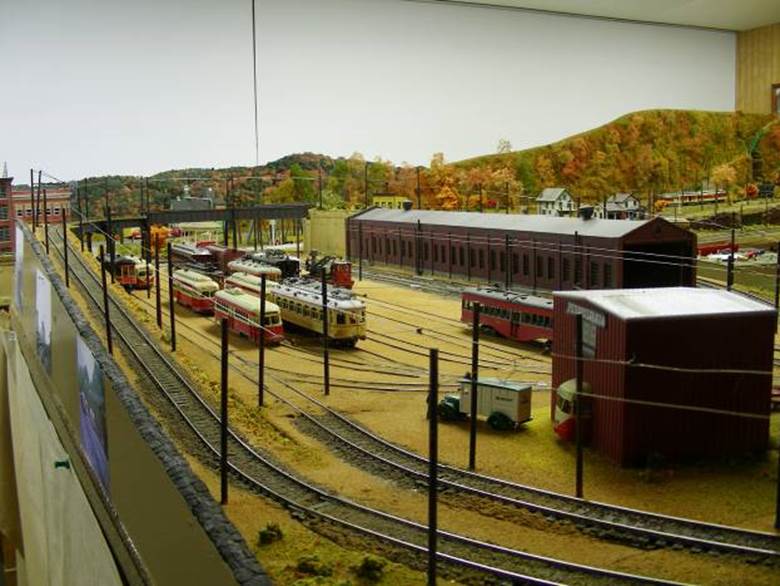
I even did the front of the Pennsylvania Trolley Museum as it appeared in years past. I did not add overhead to the yard, instead I have a flexible wire I can attach to the trolley pole to get things going (It is prototypical). I also have re-railers at the end of each track since I have such a hard time getting cars on the track.
The end of the Junction module has two East Penn connections at an angle to each other. I built the extension to interface both of these connections – the little wedge piece does the trick. By leaving the Junction via the Dormont route (top left) the car can go up over the bridge and return via the Overbrook route (lower right). Leaving the junction on the Overbrook line sends the cars back to the yard. I finally did extend that road off the edge.
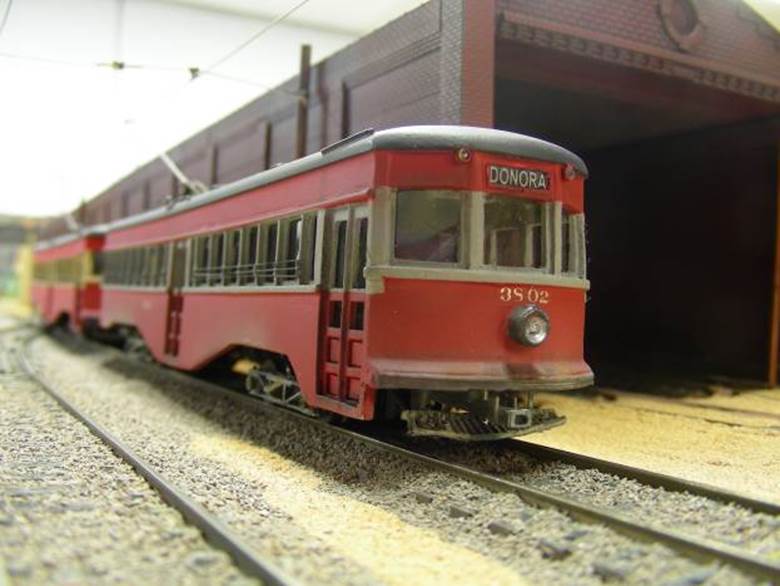
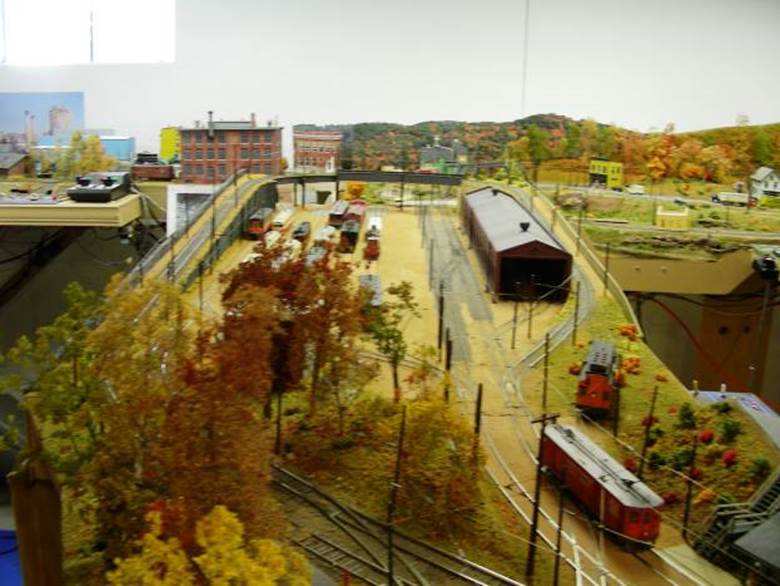
A PRCo car barn with one of my 3800 creations thanks to Howard Andrews.
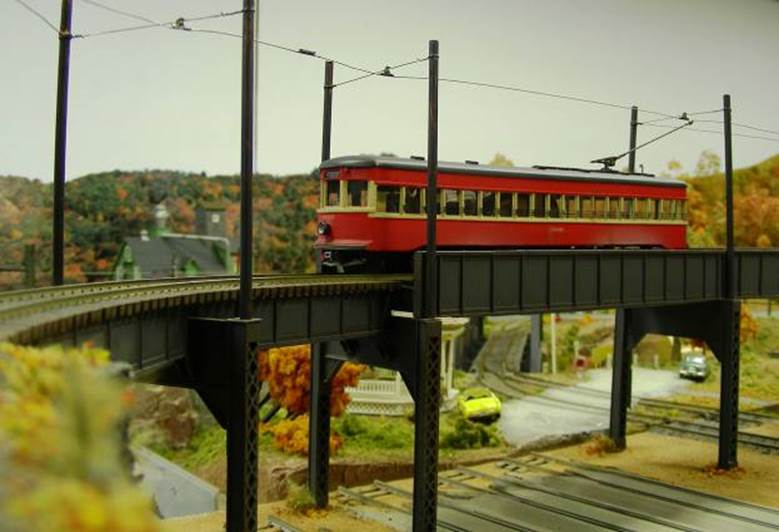
A bridge resembling those on the PRCo line. Notice those re-railers and the East Penn interface below; it connects to two modules sitting end-to-end along the back wall measuring 16’. These are permanent, at least until I get the urge to move them again.
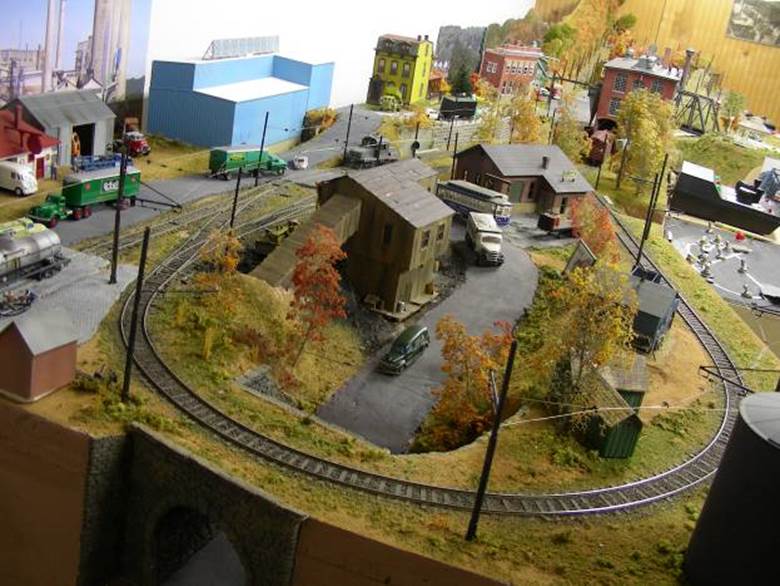
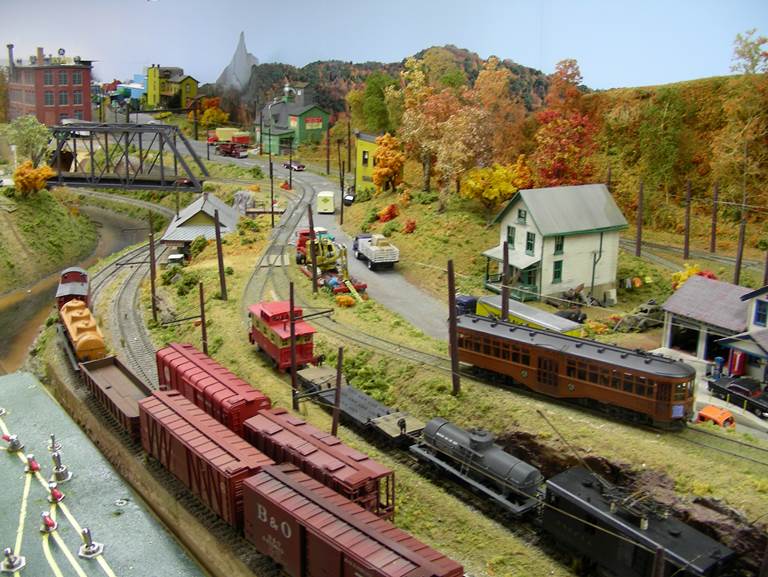
Off to the left is a section that I got from Gary Reighn when he went to O scale. It was never designed or meant to be an East Penn module, but I added an East Penn interface to it so I could run it with my other modules.

As you can see there is a history of raising, stretching and widening this piece to make it functional in various operations.
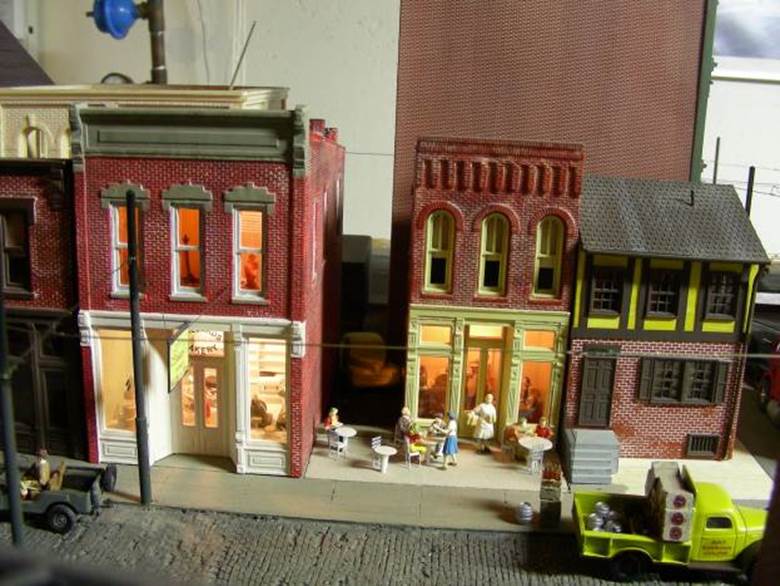
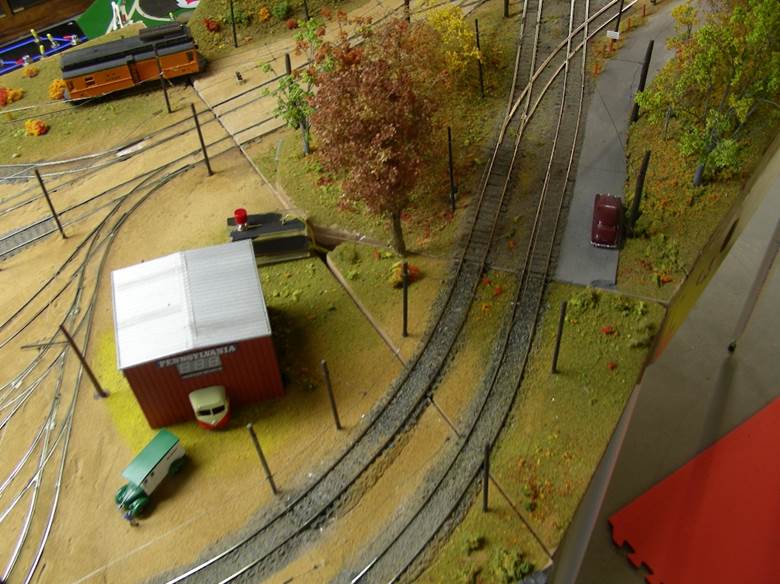
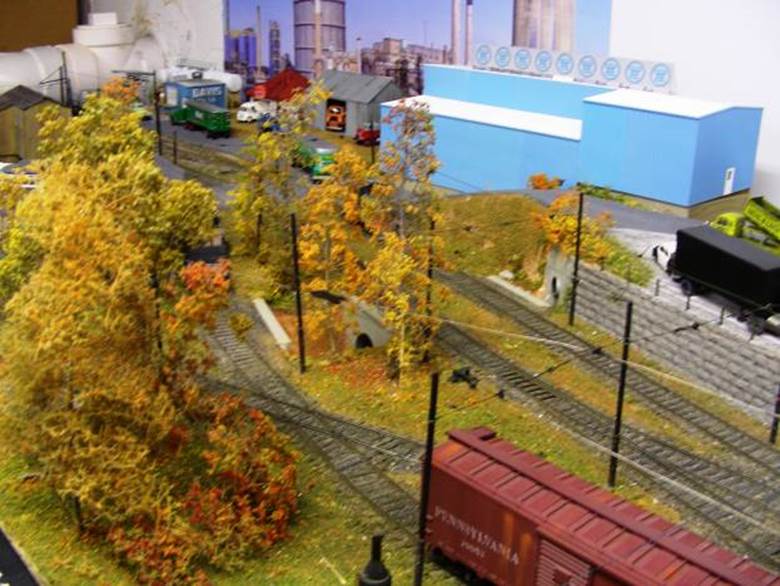
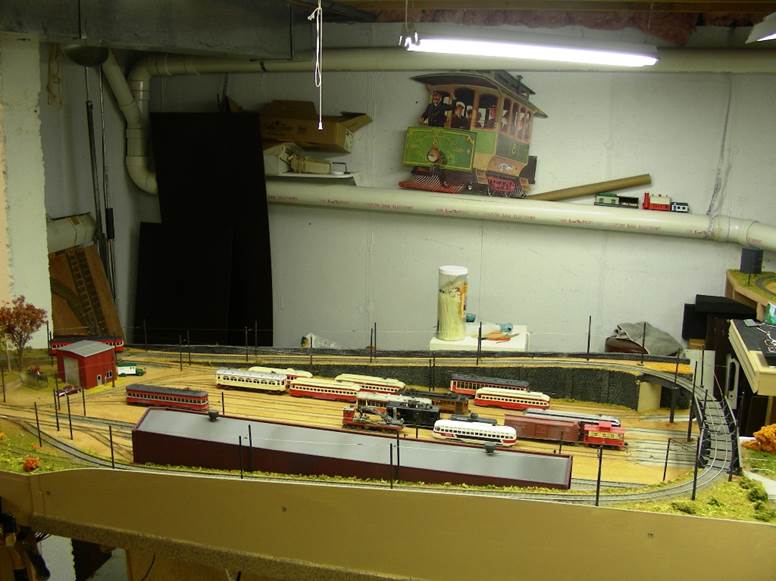
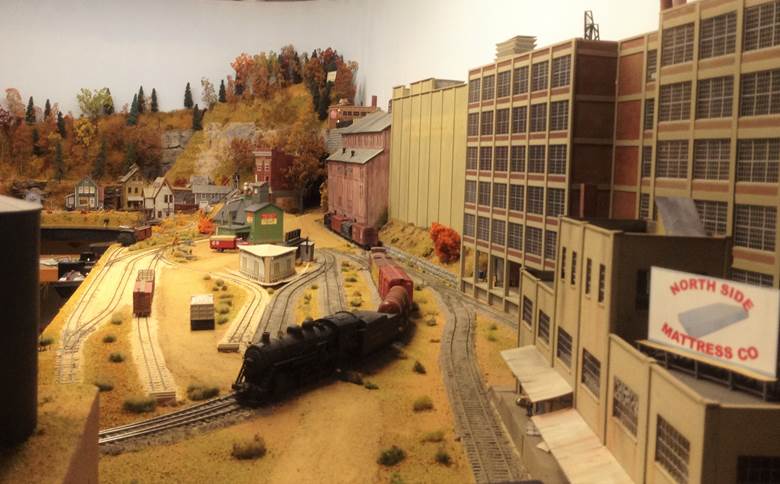
Here is where I can do some trolley freight switching with a run-around track and a couple sidings. I’ve been building mini-scenes to give some meaning to the sidings. The refinery backdrop was temporarily taped to the wall while I decided if I wanted to keep it – it is now gone.
The coal mine was a Christmas
present (a
A happy acquisition is a model of the Westinghouse sign that I used to watch from atop Mt. Washington in Pittsburgh – it flashes the circle W’s in random patterns. I threw the building together from Pike Stuff parts I had on hand, I since added some roof detail.
At the end of the section is this Walther’s warehouse building I modified with an inside track. The railroad track next to the river now goes somewhere. The river is on my old module that I took to shows before the Junction was build. It now has been permanently relegated to my basement.

The module is 10’ long; it splits in the middle for transport. One reason for retiring it to the basement was the weight of the thing – heavy – and it fell a couple times when I was moving it.
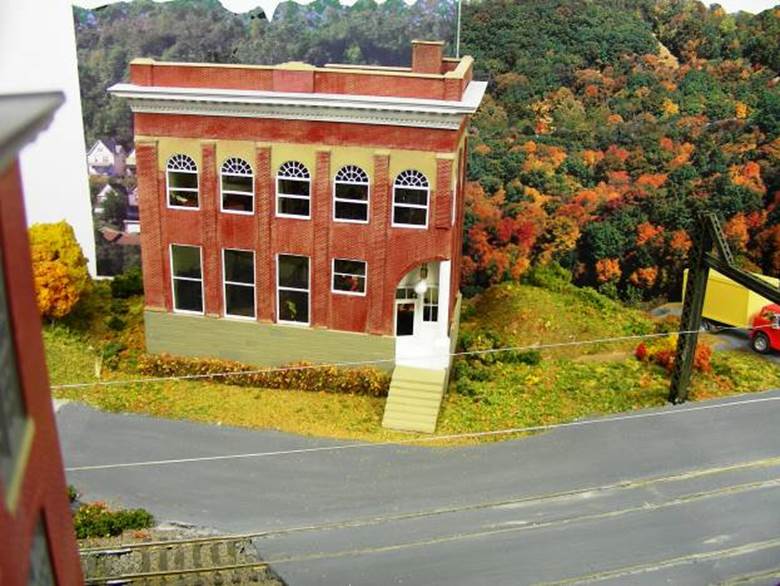
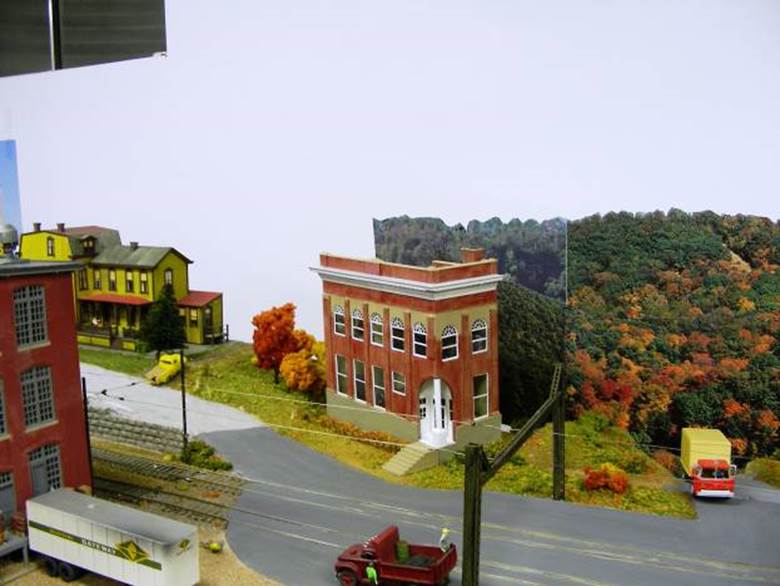
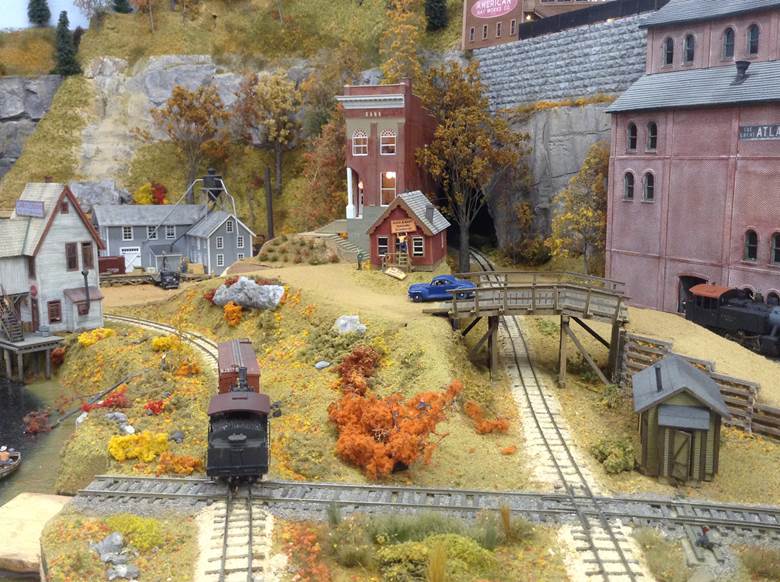
My model of the Cairo WV bank building occupied the interface between this module and the one we just left. There is a hole there now since the bank moved to the new layout. As you can see there is nothing to give the impression that these modules will ever be moved.
Plans for the bank appeared
in RMC around 1983, it took me from then until 2010 to build it. It has a complete interior of my own design
with internal lighting. I used
microscope glass making the interior clearly visible. The dirty yellow house is where I spent my
formative years on
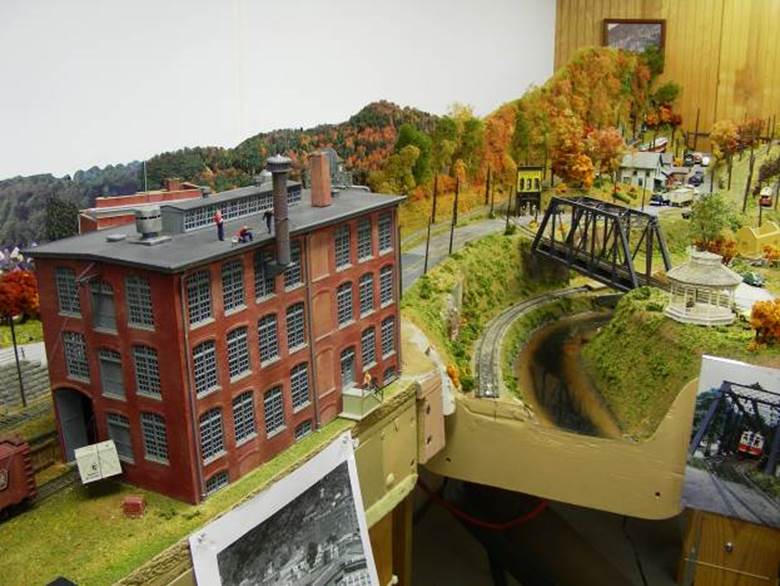
The module interface from the
Junction module extension goes directly onto this gauntlet bridge. The area was modeled after the Ellicott City

I know, I know, the Witts
never went to Ellicott City because it had no reverse loop, but this is the
only
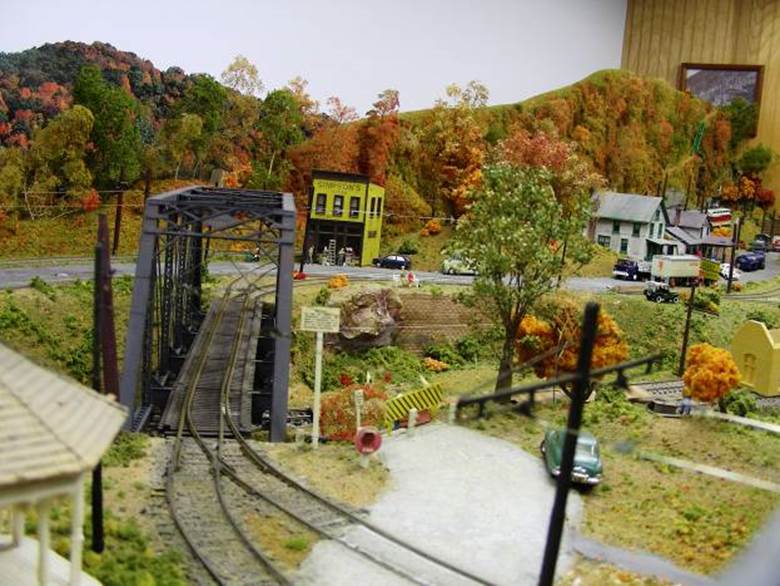
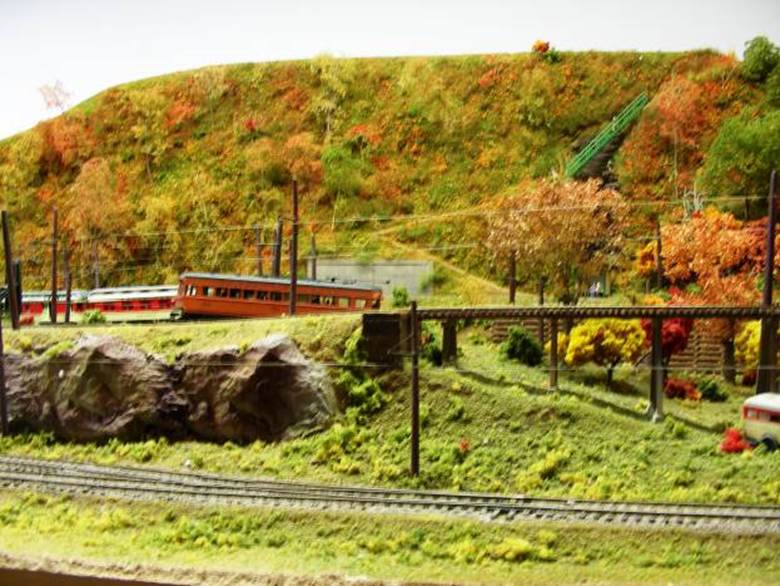
Across the bridge traffic must turn right and, usually, head up the hill. The branch to the lower right is the freight interchange with the railroad along the river.
Climbing the hill a West Penn 700 car passes Aunt Fran’s house and Dad’s Sunoco station. Would you believe the house is from a painted lady kit? It would have been easier to scratch build it than to kitbash. The box motor is heading down to the interchange track.
Do you get the impression
that this area represents the

Here is the view from the bottom of the hill.
And from the other end. Notice the two road-kills, one on the road and one behind the building – busses just didn’t hold up like streetcars.
An overview from the high end of the module.
I mentioned the railroad tracks along the river going somewhere someday. Well, the day has come.
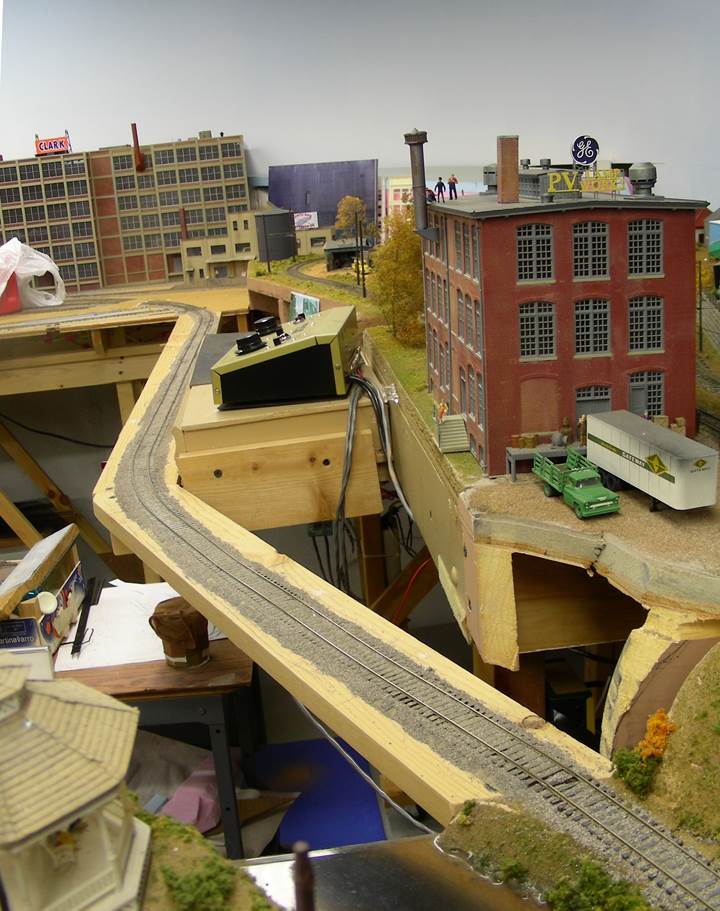
From the module the railroad runs around the control panel and off to the new layout.
Notice the large sewer pipe along the wall. The railroad layout is built directly below the pipe and I didn’t want a big blue pipe to be part of my sky so I made a project of hiding it.
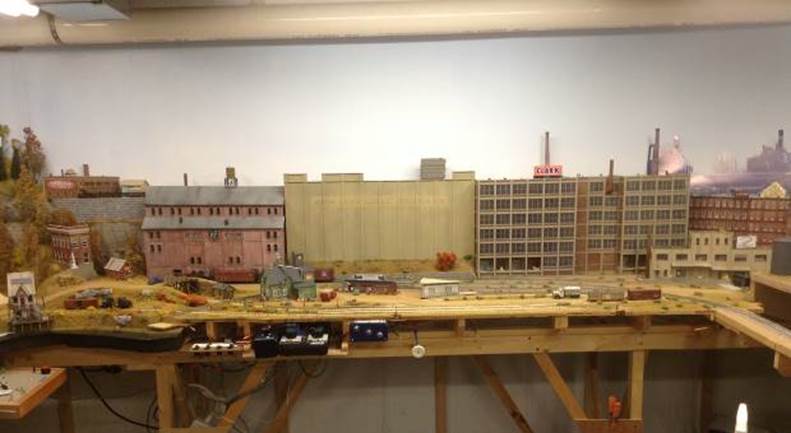
Here is that same location, no pipe. Most of the scenery is finished here, only the freight station remains to be built.
This is a 10’ x 6’ L shaped layout in the corner. As the railroad enters from the right rear it makes a wide arch and arrives at a fiddle track that attaches at the lower right of the photo. A passing siding and several spurs provide some switching possibilities. The track at the front of the layout is HOn30 narrow gauge based loosely on Maine Two Footers. In HO scale 30” just happened to be the gauge of N scale track. Therefore we can use N scale engine mechanisms, trucks, and track if we want.
Track is flextrack for standard gauge, hand laid code 55 for the HON30 – I like to suffer.
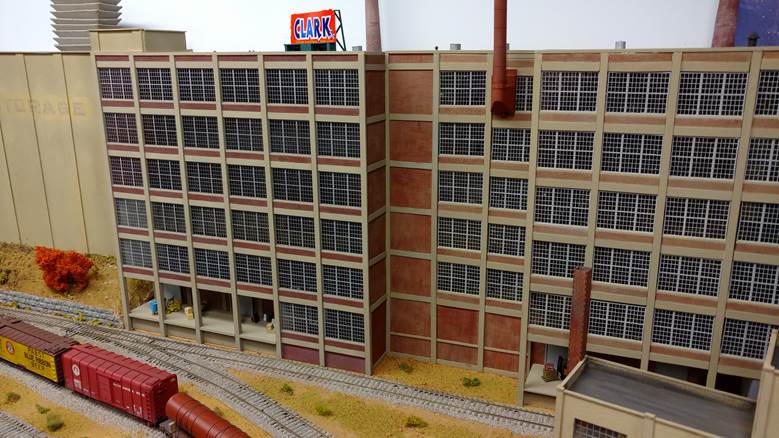
The Clark candy factory is a combination of cast resin parts on the right and a laser-cut sheet on the left. Allen Underkofler was kind enough to do the laser work after he saw how much effort it took to clean up the castings. The base structure is Plexiglas.
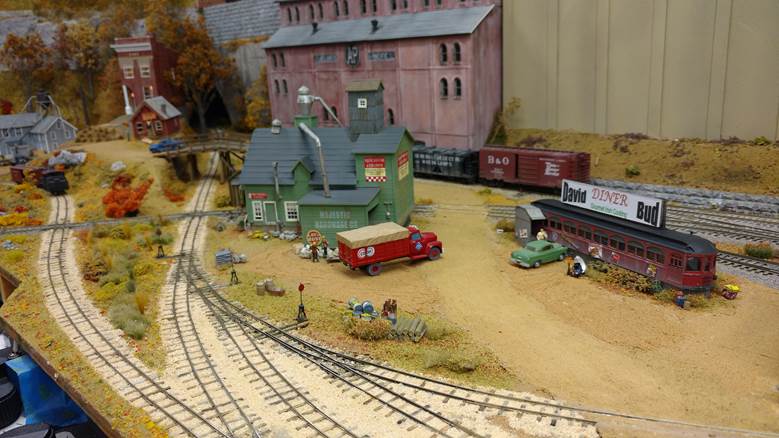
The most recent addition to this section is the diner made from a Bowser LVT 900 body and the hardware/grain store moved from one of the back modules. This area needed businesses that didn’t require a railroad service. The hardware/grain store was once an important supplier of feed to local farmers but many farms were replaced by housing developments to support the returning GIs after WWII so now hardware is the main purpose of the store.
I scratch built the narrow gauge engine on top of a Kato N scale mechanism.
Looking toward the corner of the layout the standard gauge track ends with a location for a fiddle track. The HON30 goes in two directions, along a river to the left and up a grade through a cut in the hill at the right. Since there were no tunnels on the Maine Two Footers I just made the track disappear into a cut. It will reappear through another cut above and to the left.
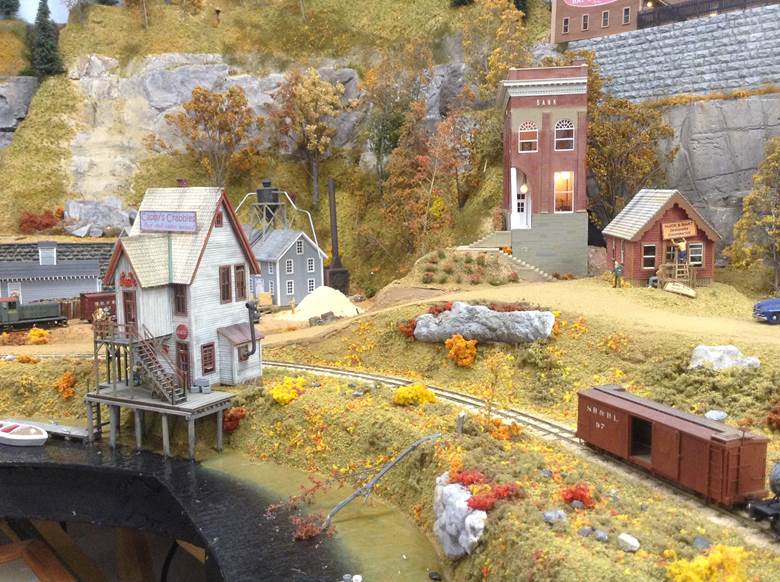
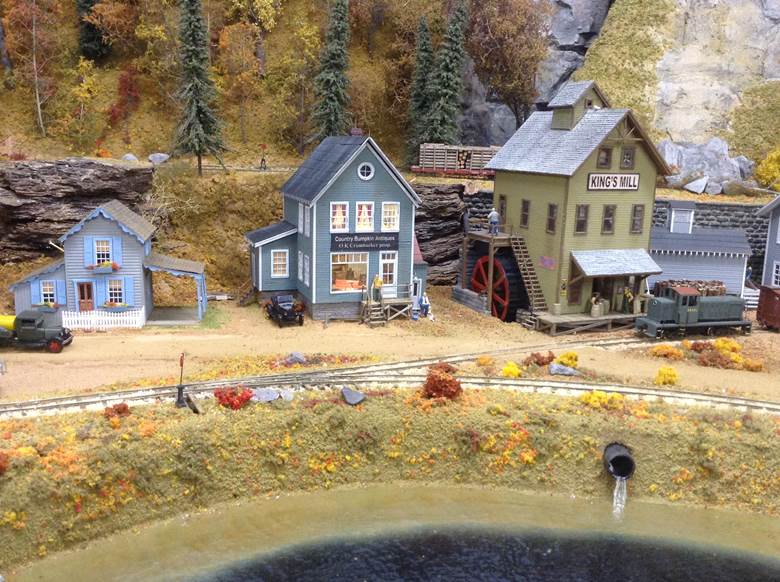
Moving along the river we go back in time from the mid 50’s to the 1930s. You can see the Cairo Bank in its new location and Cappy’s Crabbies, a Bar Mills kit modified to sit over the river. A popular place on Saturday night.
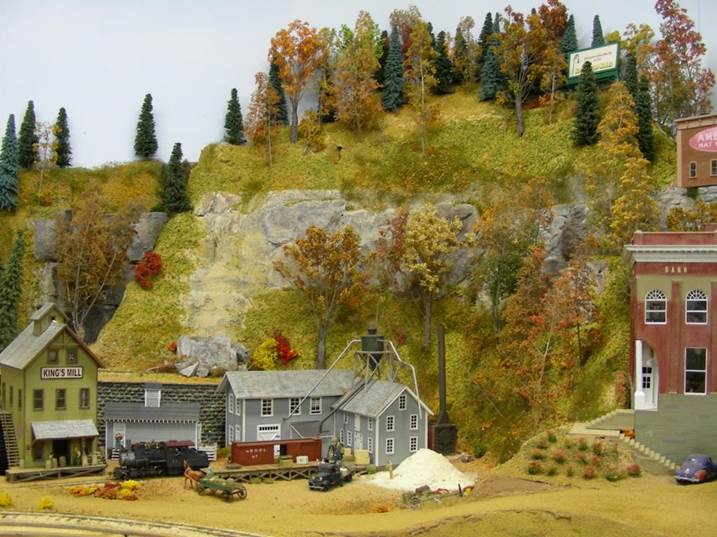
This view is of the hill that hides the pipe and the track curving up from
the lower lever. The gray buildings
represent a wood turning mill that will take the pulpwood loads that come from
the track on the upper level then ship out boxcar loads that must be
transferred to standard gauge boxcars at the yard. King’s Mill was scratch built from an article
in MR by Ben King.
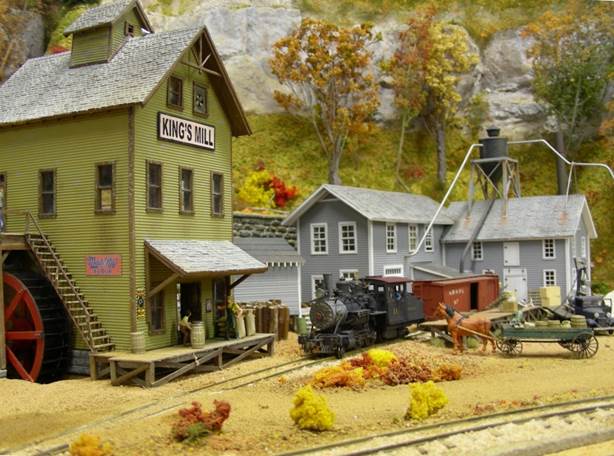
A closer look at the mills with SR&RL #11 switching the turning mill
while a farmer waits to deliver a barrel of grain to King’s Mill.
The narrow gauge serves a waterfront and a few industries. The little house at the left is a model of a
house in Chesapeake City MD.
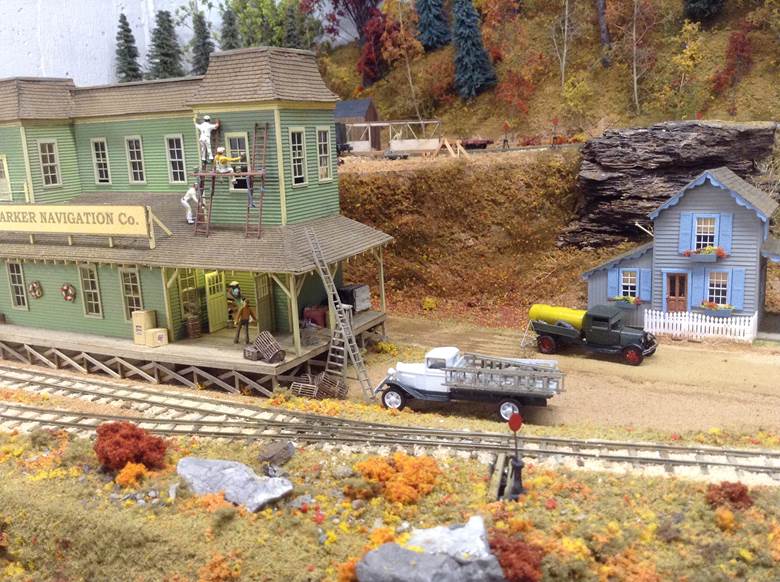
Continuing to the left is Parker Navigation Co. providing everything one
needs to navigate the river. This a Nick
& Nora background building that I modified and brought to the front. Made narrow for placing against the backdrop
it looks deeper than it is:
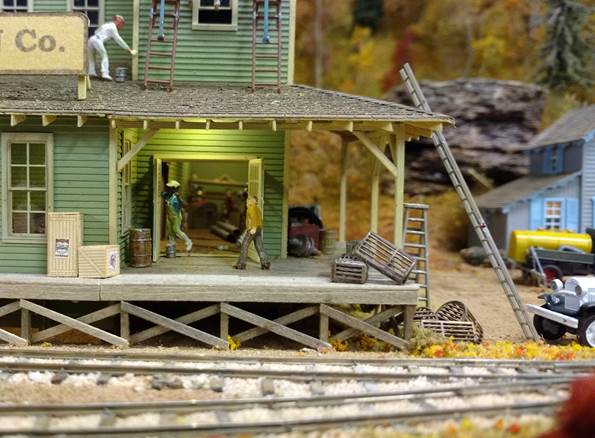
If you look straight in the door.
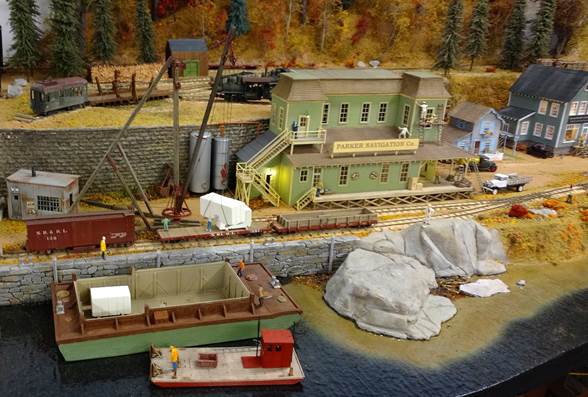
Parker also has a 3-Leg Derrick used mostly to load granite from the
narrow gauge cars to a waiting barge.
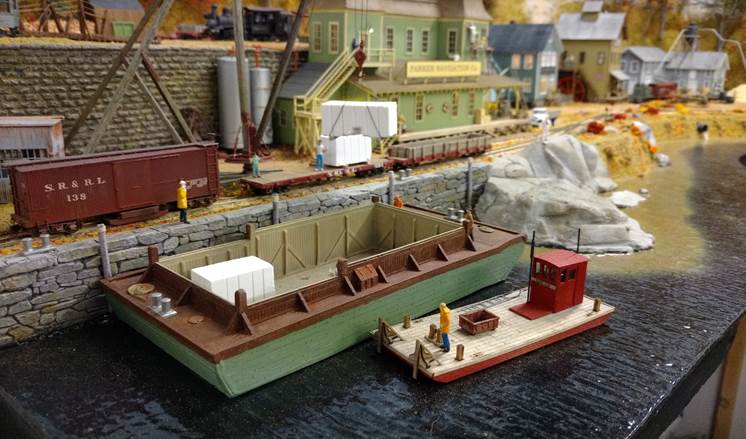
The river was a late addition to the layout. It is made from a piece of blue foam with a
masonite top painted to show the shallow to deep transition. The water is represented with about 7 layers
of Mod-Podge. The large rock in the
river doubles as a base for the standard gauge fiddle track. I store extra tracks under the layout.
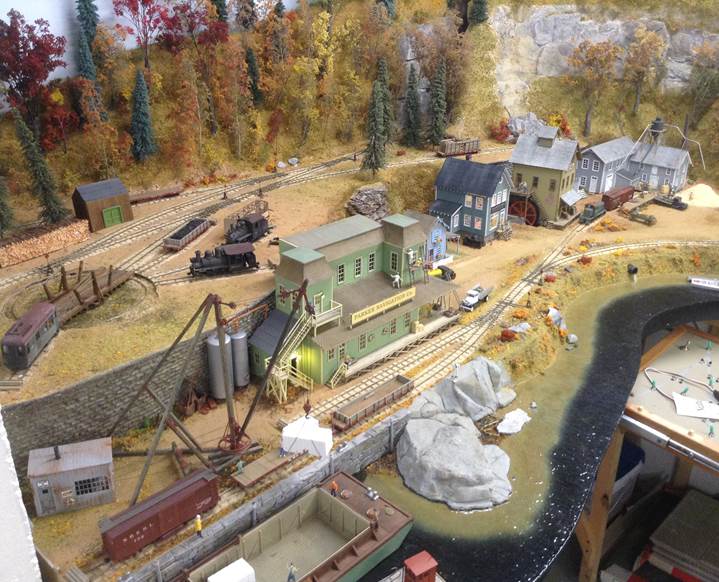
An overview of the area shows the river in the foreground and the upper
level toward the top. The tracks in the
upper level run through a cut behind the trees in the upper right and descend
to the other cut in the lower level.
 .
.
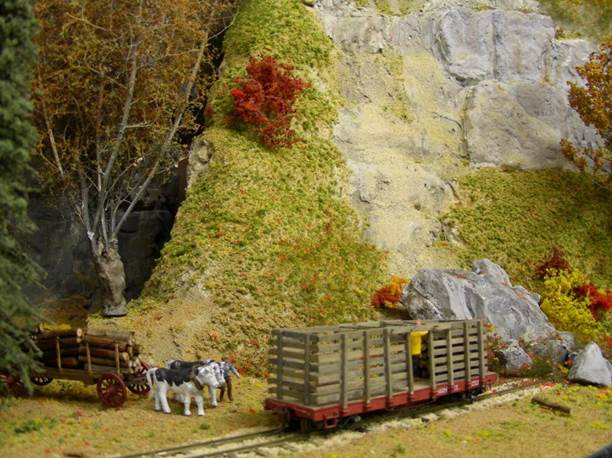
On the upper level farmers bring cut pulpwood for loading onto the “rack”
cars. In reality this was a wintertime
effort using skids but I took a little license here. Note the rockslide that came crashing down
into the end of the spur a couple months ago.
The rock slide only took out about a cars length of the spur so the
railroad decided it was not worth the effort or cost to remove it.
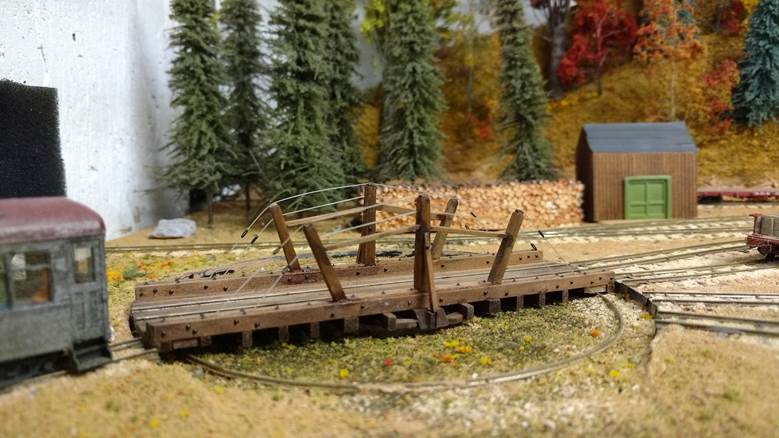
All track is complete and a turntable given to me by Sam Parker is installed and functioning.
There is no wiring to the turntable, it picks up power from the track it aligns to. You can see two curved wires that will rub against that track.
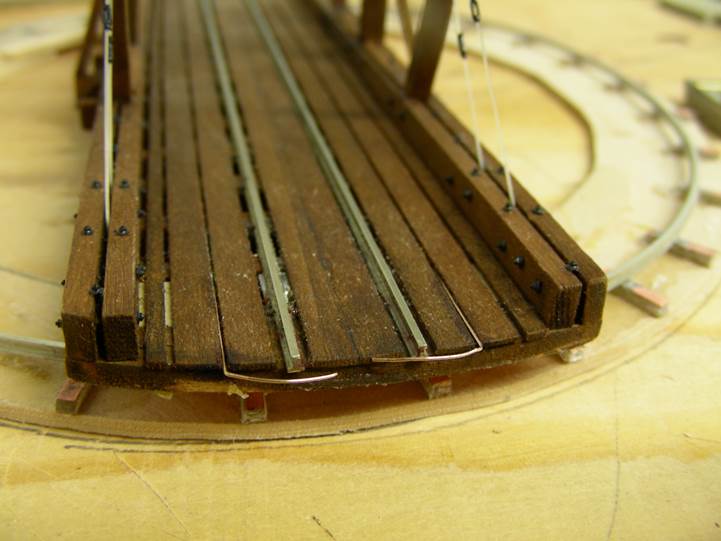
A hearing-aid battery holder is the base of the table. All finger power.

This general view of the upper level shows the arrangement. The gondola loaded with coal is the supply for the engines – the crew shovels it by hand. Behind the trees to the top left is a branch to the granite mine that is off the layout. At the upper right you can see the track heading into the cut. Soon, hopefully, a car shop will be constructed behind those two engines.
The other corner still needs a little work. The pieces of foam are glued together and are removable to allow access to the back of the trolley module. Someday I’ll make something of it; in the meantime a couple background and mock-up building occupy the space and it does hide the pipe (almost).
I’ll provide updated photos as progress continues.
Thanks for visiting, now it is back to building models.